Add Your Yahoo Account to Outlook 2003 Using IMAP
To set up your Outlook 2003 client to work with Yahoo:

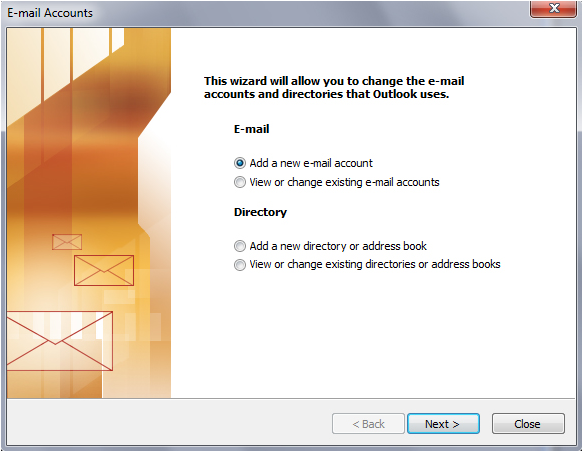
- Click the Tools menu, and select E-mail Accounts
- Click Add a new e-mail account, and click Next
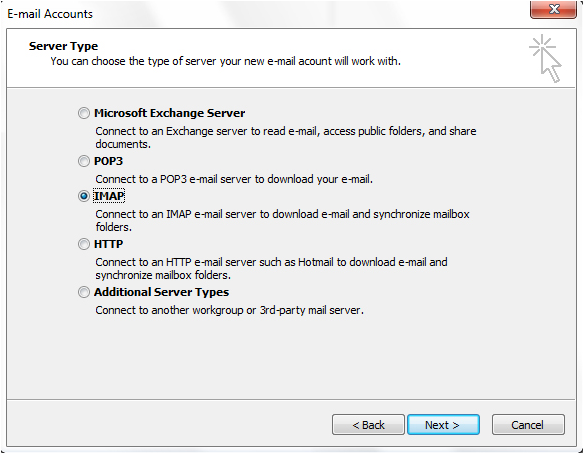
- Choose IMAP as your server type by clicking the radio button, and click Next
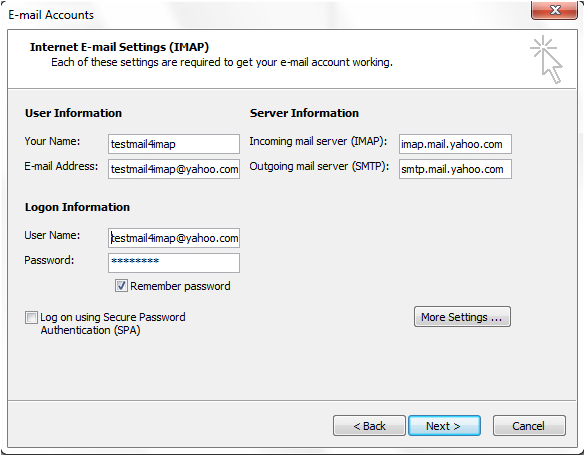
- Fill in all necessary fields to include the following information:
User Information
Your Name: Enter your name as you would like it to appear in the From: field of outgoing messages.
Email Address: Enter your full Yahoo email address
Server Information
Incoming mail server (IMAP): imap.mail.yahoo.com
Outgoing mail server (SMTP): smtp.mail.yahoo.com
Login Information
User Name: Enter your Yahoo username
Password: Enter your Yahoo password
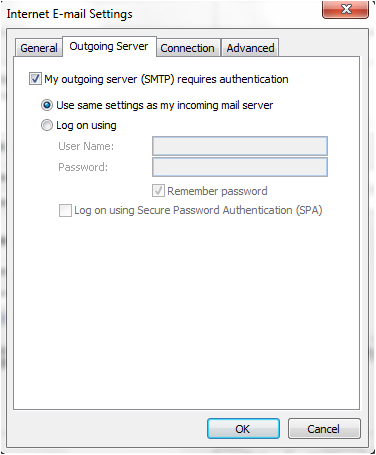
- Click More Settings... and then click the Outgoing Server tab
- Check the box next to My outgoing server (SMTP) requires authentication and select Use same settings as my incoming mail server
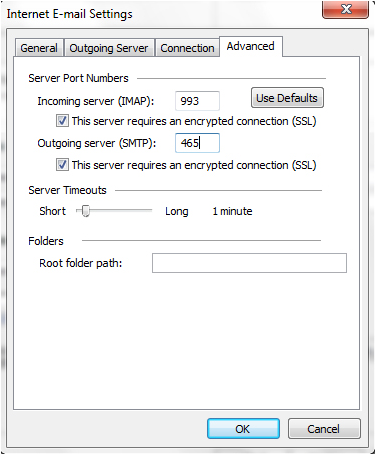
- Click the Advanced tab, and check the box next to This server requires an encrypted connection (SSL) under Incoming Server (IMAP)
- Check the box next to This server requires an encrypted connection (SSL) under Outgoing Server (SMTP)
- IMAP port is either 993 (ssl) or 143 (very infrequently 585 (ssl))
- SMTP port is either 25 or 465 (ssl) (very infrequently 2525)
- Click OK and Next
- After receiving Congratulations! All tests completed successfully, click Finish.
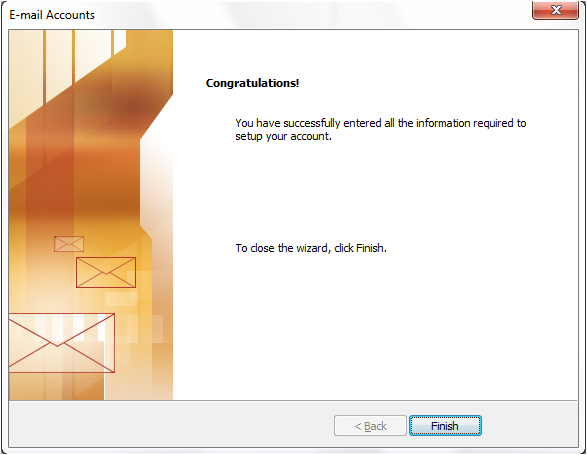
- Now you can check your Yahoo mails from outlook

Import your old POP account into the newly created IMAP account
If you currently keep a copy of your mail on the server, then you're done! But if you delete them from the server, then you have to import your old POP mail into your IMAP. Here's how to do it
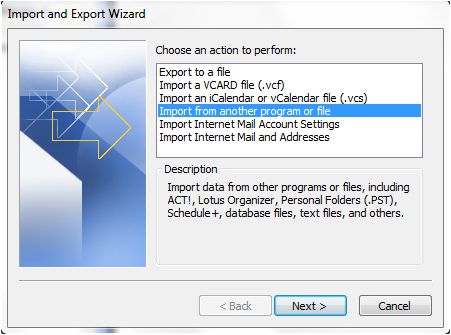
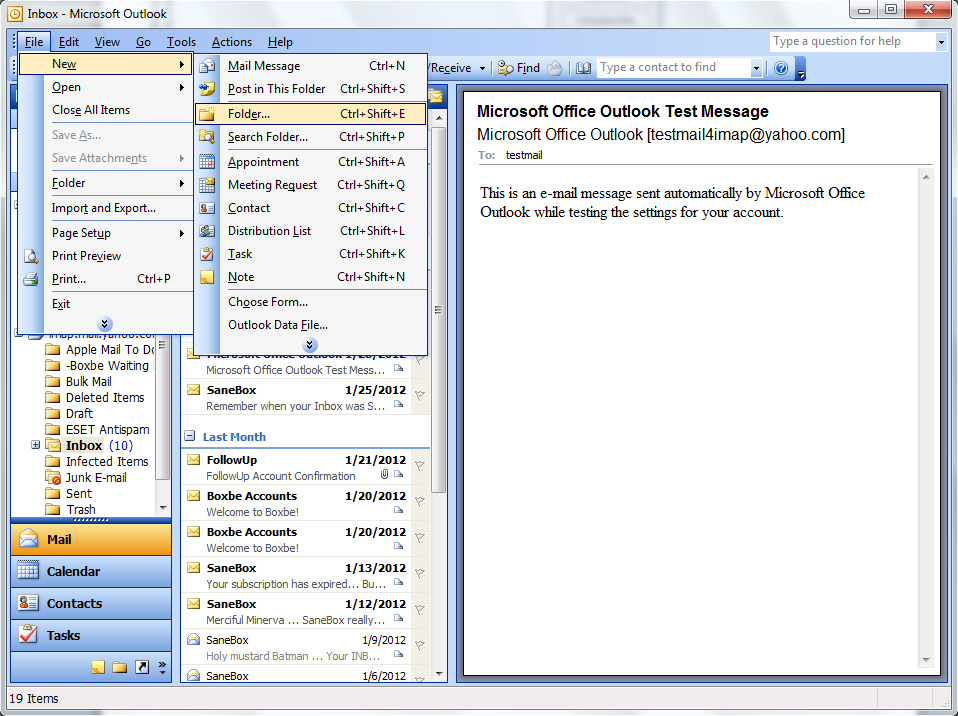
- On the File menu, click Import And Export
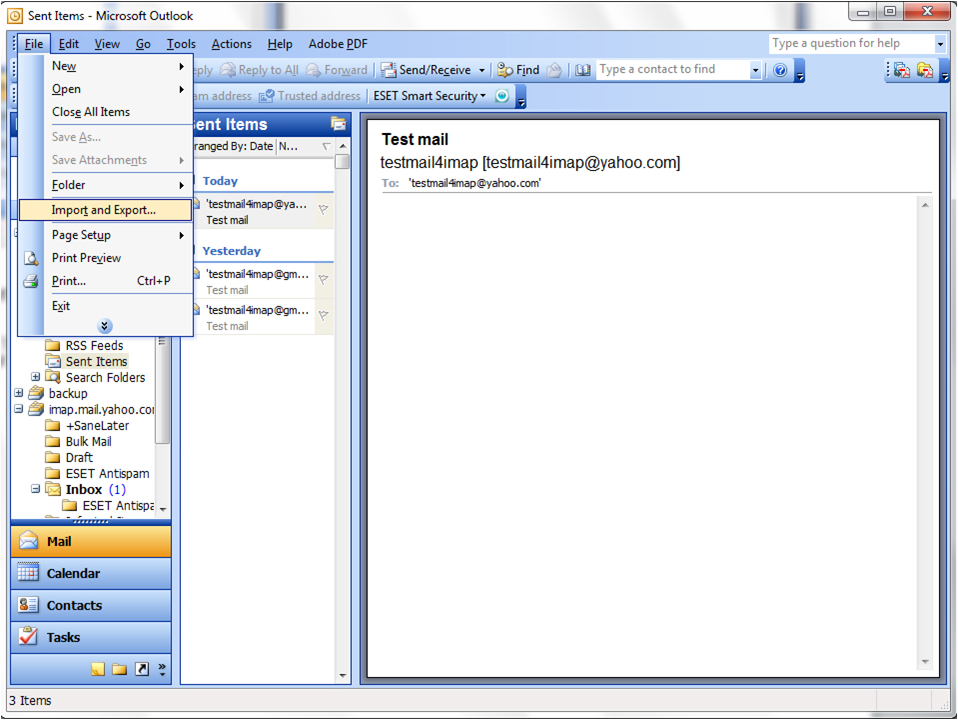
- Click Import from another program or file, and then click Next
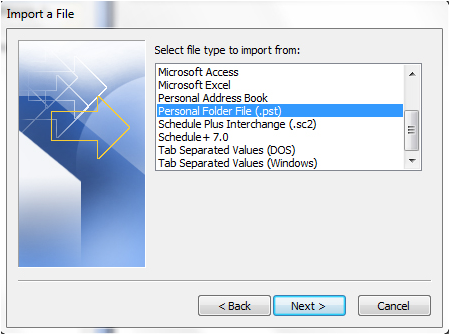
- Click Personal Folder File (.pst), and then click Next
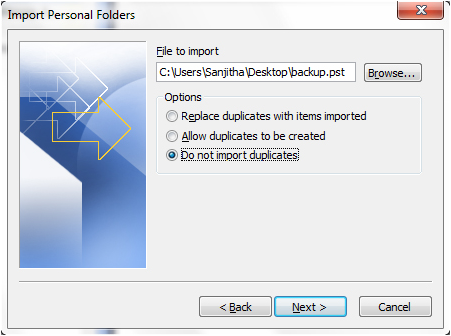
- Click Browse, and then choose the file to import
- Under Options, it is recommended that you click Do not import duplicates unless you want the imported information to replace or duplicate items already in Outlook.
- Click Next
- Set the options for importing items. The default settings usually don't need to be changed

- The top folder - usually Personal Folders, Outlook Data File, or your email address - is selected automatically.
- Include subfolders is selected by default. All folders under the folder selected will be imported.
- The default selection of Import items into the same folder in matches the folders from the imported file to the folders in Outlook. If a folder doesn't exist in Outlook, it will be created.
- Click Finish.
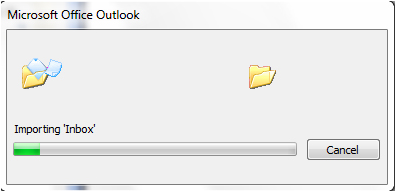
- You can check your back up data on outlook
- And the very important thing is you have to delete your old POP account from the outlook, Otherwise they will continue to receive email in the old POP account.
- Right click on your old POP account Close it
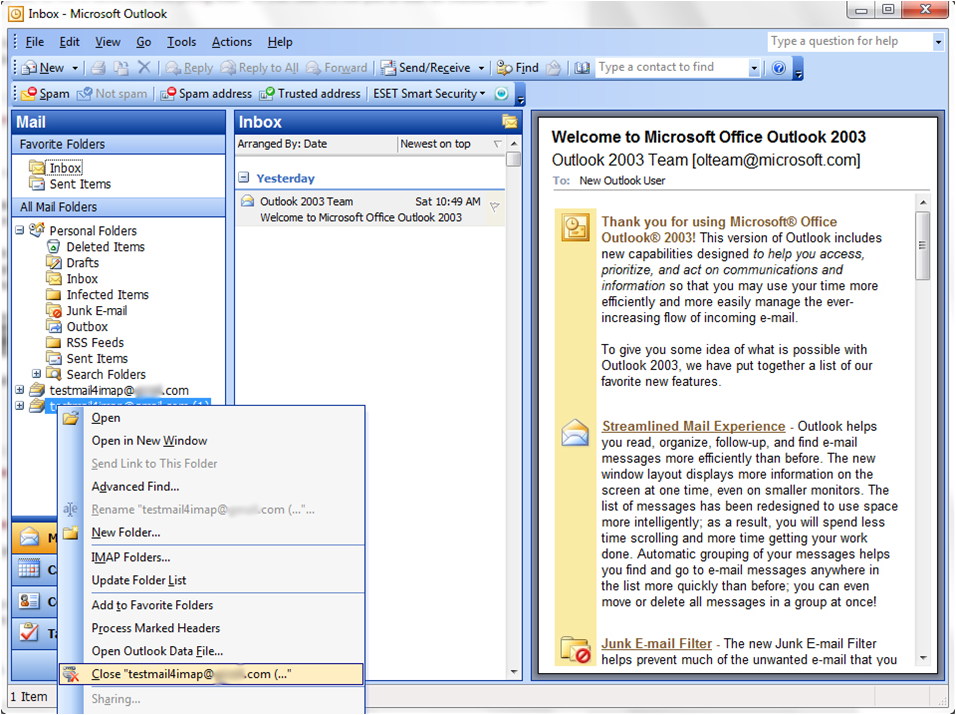
- Now you can continue with the IMAP account.
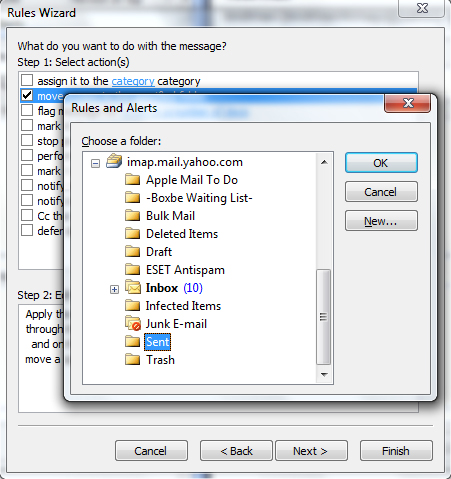
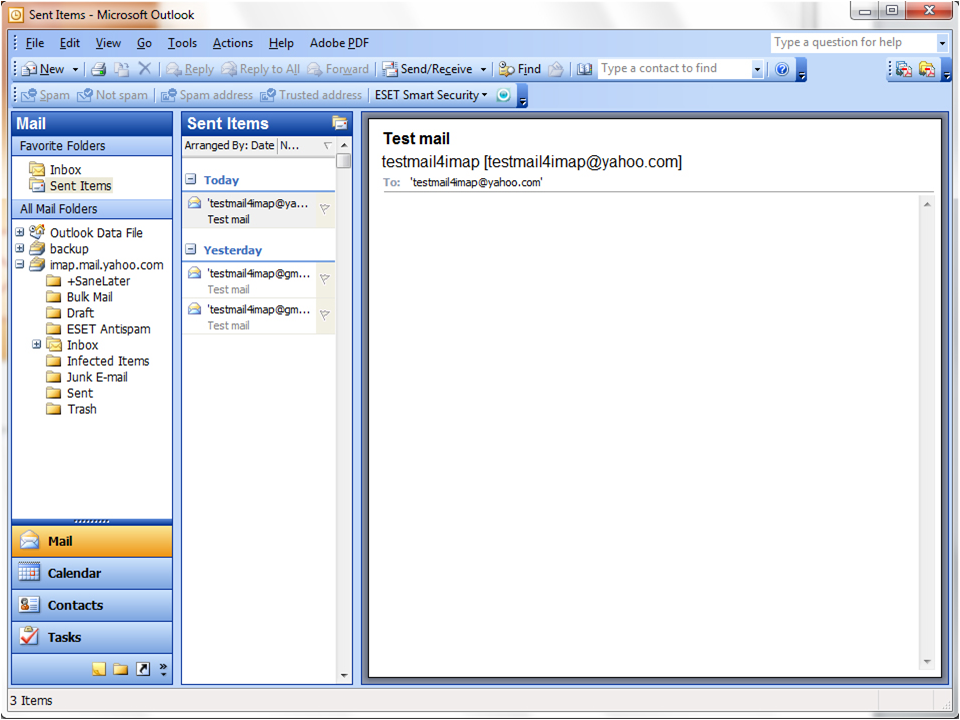
Setting up your Sent folder properly
As Outlook 2003 and previous do not have support for assigning a Sent Items folder at the mail account level, we must emulate it via a message rule;
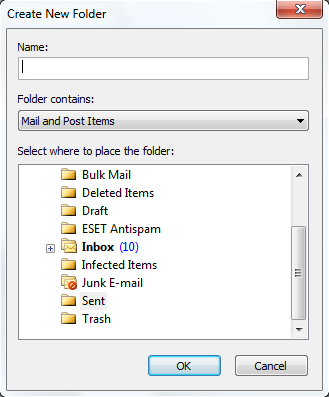
- First make sure there is a Sent Items folder in your IMAP mailbox.
- If you have not subscribed to the Sent Items folder yet, choose Tools > IMAP folders

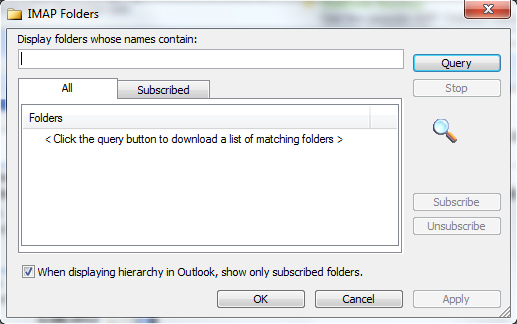
- If no Sent Items folder exists yet, choose File > New > Folder
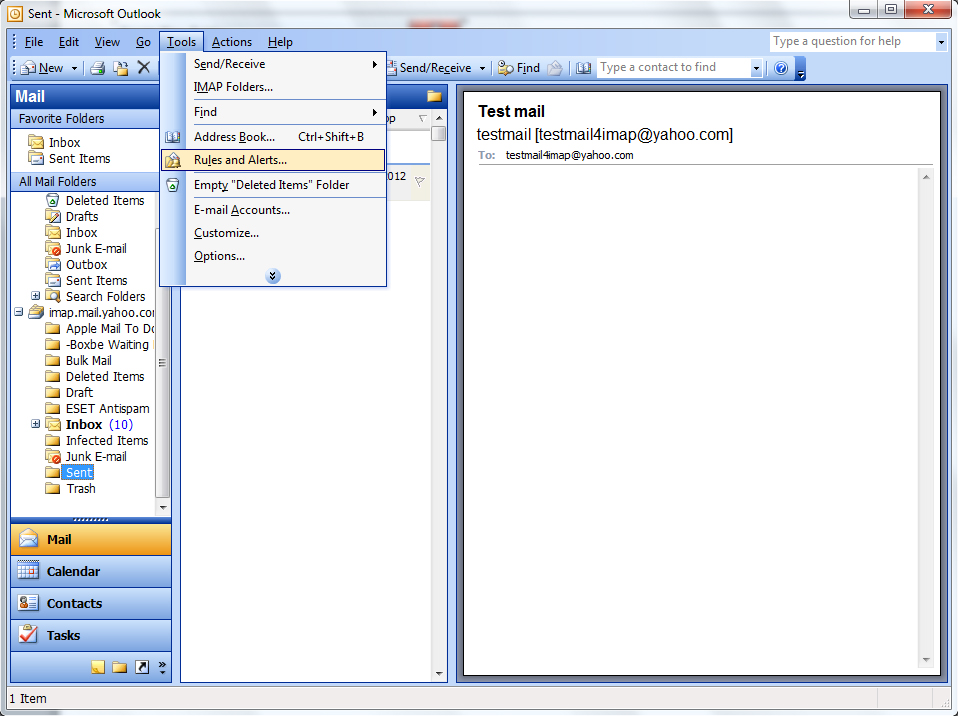
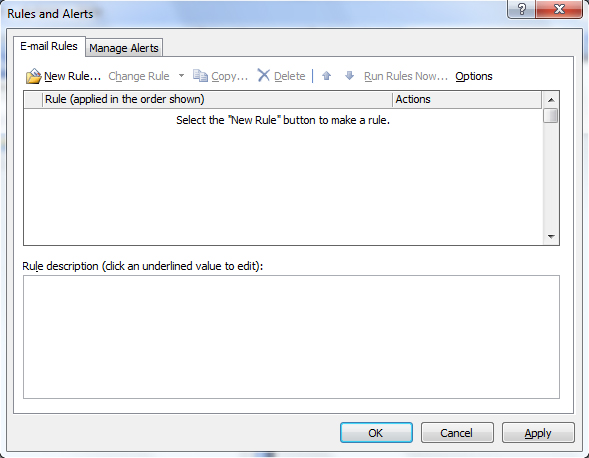
Then: - Open the rules dialog via Tools > Rules and Alerts
- If you see a dropdown list at the top, make sure it is set to the Inbox of the IMAP account.
- Click the New button to start with a new rule.
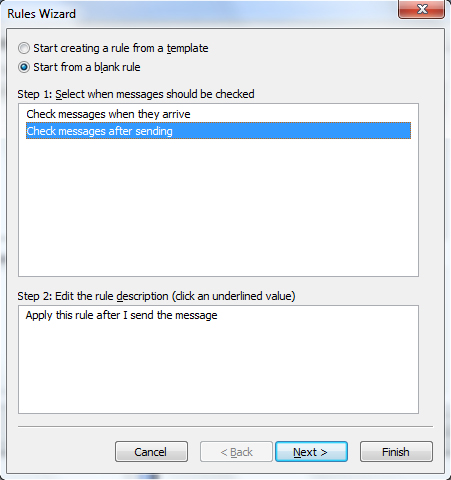
- Select the option; Start from a blank rule
- Select Check messages after sending.
- Click Next.
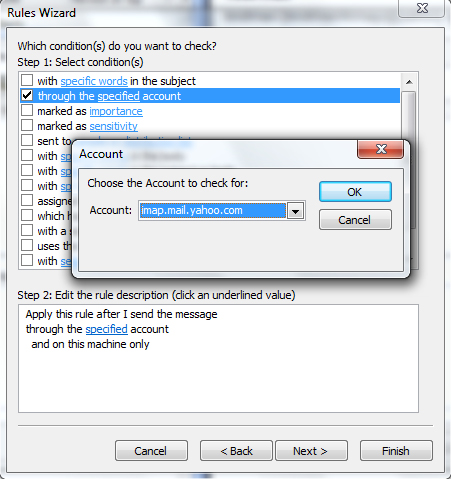
- Select the option; through the specified account
- Click on specified at the bottom of your screen and select your IMAP account.
- Click Next.
- Select the option; move a copy to the specified folder
- Click on specified at the bottom of your screen and select your Sent Items folder in IMAP account.